Composite Glassing Phenolic Rocket
Airframe Tubes
This is a description of some of my recent work glassing rocket
airframes with carbon fiber. This is "yet another tube glassing
article" but I wrote it because the others either didn't match my
thought process or didn't have enough pictures, or both. I hightly
reccomend you start with the INFOcentral
Construction forum articles on reinforcing tubes, Easy Glassing,
Vacuum Bagging, and Heat Shrink Tape. Well, all of their articles, but
that list is most germain to this subject.
Jigs and Fixtures
Airframe Tube Wrapping Jig
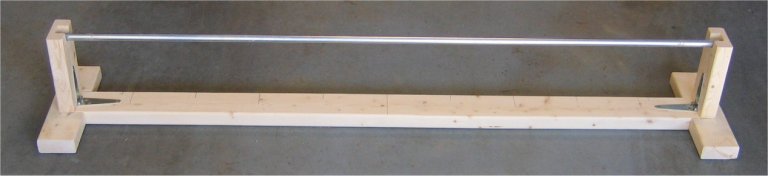
I built this tube wrapping jig out of some 2x4s and a couple of hinges.
The hinges aren't required, but will help it store a bit more
compactly. The arm length is five feet. That will allow a 4 foot tube,
two endplugs, and some slack, and is also conveniently half of a ten
foot stick of EMT conduit used for a support mandrel.
It's hard to see in this picture, so click here or on the above picture
for a high res view, but the I beam of my jig has a
cenerline and outling marks every six inches. I also have marks for the
standard widths eg 30, 40, and 50". Thus if my tube is centered and my
carbon fiber is centered then it will all just pull up, roll up, and
lay up nicely without pulling the weave sideways.
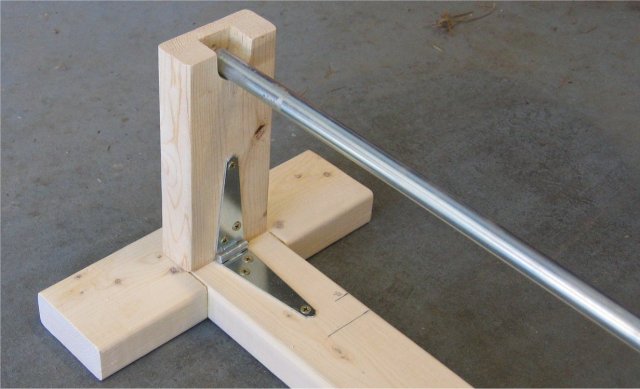
This shows a bit more detail on the jig. After wrapping a couple tubes
with heat shrink tape, and fighting the tape, I think I want to add a
support rod in the lower front to hold a roll of heat shrink tape. More
on that later perhaps.
Airframe End Plugs
For each size of tubing prepare end plugs. You want several inches
protruding out the end of the tube and several inches inside. I
generally follow the 2X diameter rule for length. When prepared with
mylar the end plug you'll probably find it difficult to even get it in
half way (diameter length) unless you use thin mylar tape. I prefer the
heavy duty packing mylar tape. If you use the 5 foot poles and jig
length you'll have a total of 6 inches on each side maximum outboard.
This isn't much of a concern with 4 inch and under body tubes but will
be a factor if trying to squeeze 6 and 7.5 inch tubes in the 5 foot jig
and oven.
Preparation
The key to a successfull composite layup is preparation - in particular
having everything ready and in place.
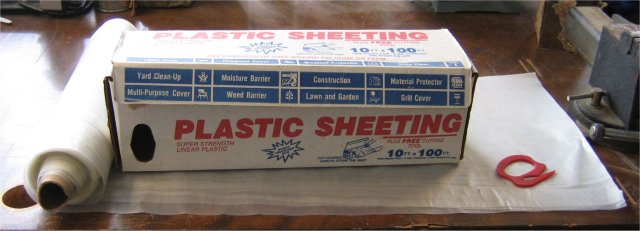
I lined the table with plastic sheeting. It's much easier to work with
than newswpaper for everything from laying out and cutting fabric to
the wetting out and layup as it wipes up clean. Epoxy won't stick to it.
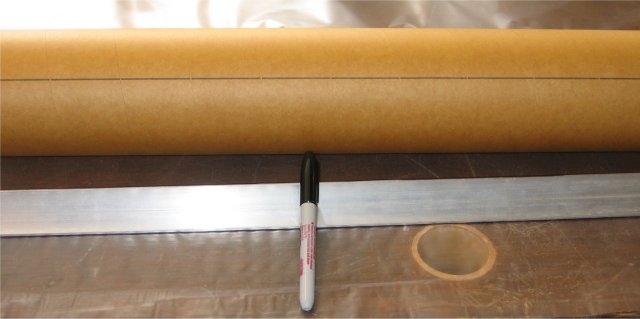
I draw an index line along the body tube to align the starting edge of
the fabric. Use a magic marker and a section of angle Fe or AL. If the
fabric is wider than the body tube, say using a 50" wide warp roll on a
48" tube, it's handy to mark the inch overlap on the endcaps to
facilitate maintaining the alignment as the fabric is rolled on.
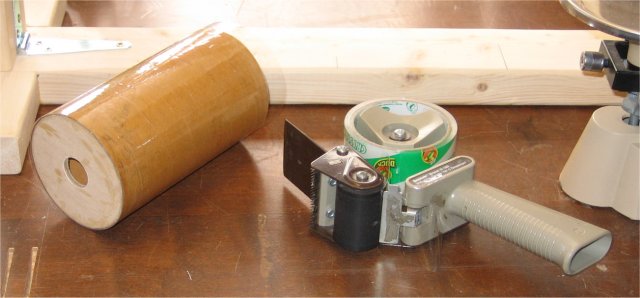
I wrap mylar packing tape on the endcaps to provide an easy release non
stick surface. We don't want our endcaps to get glued in! We use
endcaps to provide a convenient runout surface for fabric overlap and
shrink tape start and runout. If it's a tight fit then you may need a
set of shorter plug. You want about 4 inches or so sticking out each
end.
Do note that after a trip through the oven the tape will leave adhesive
sticky on the tube if you peel the mylar off. This will then collect
dust and get all nasty. So I recommend leaving the mylar tape on and
only replacing it when it gets damaged.
As a point of technique, after
inserting the endcaps into the tube, I will make a Magic Marker
mark to denote the width of the cloth. This is very helpful if the
cloth is much wider than the tube. So for a 50" (a standard width)
layup on a 48" tube I'd make a mark an inch out on each endcap. Note
that I do this on the Mylar and after the endcap is installed, as the
endcap will insert a different distance on each tube and end depending
on the tightness of the fit, the overlap of the mylar, etc, so that
shouldn't be that permanent. We'll peel and toss the mylar tape after
the job as part of cleanup.
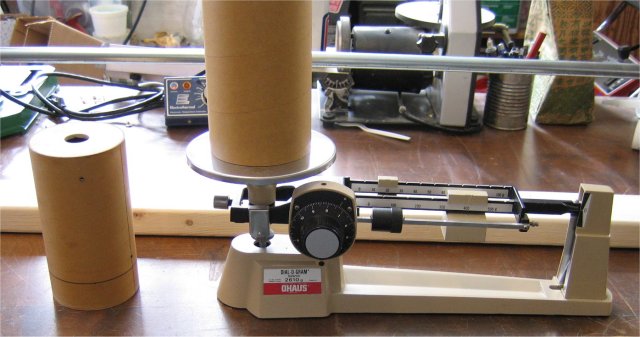
I'm weighing the tube to see how my technique is working. The "amateur
norm" seems to be 50% to 100% additional weight of epoxy to fabric. I
want to see how well I do, mostly for reference later. I'll put those
weights in a customer RockSim "Mike's Parts" database for use later.
You want to glove up now. Put on two layers of latex or nitrile gloves.
The second layer is the peel and replace layer so you've always got
latex on your hand. I highly recommend a pile of extra gloves pulled
out and handy, a pile of paper towels handy, a squirt bottle of alcohol
handy, and a garbage can handy. You want everything ready and then it'll be
a breeze.
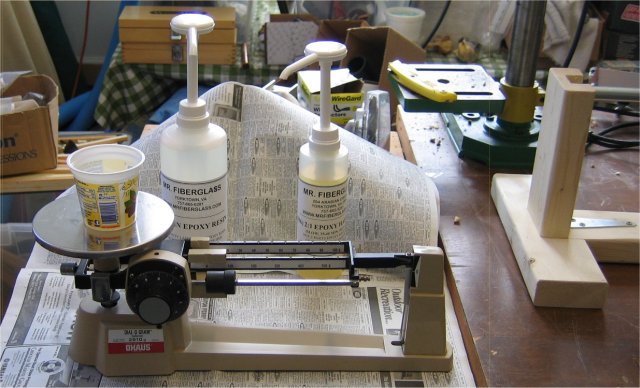
I am weighing out the epoxy. Mostly because for my first time I haven't
a clue how much I'll need. I weighed out the fabric and then weight out
an equivalent weight of epoxy. As it turns out, I needed about 30% more
to complete the wet out. We'll see what my weight ratio ended up being
afterwards. Otherwise, if you burp the air bubble out of your epoxy
pumps you can just work in increments of the proper ratios of pumps as
you'll be using quite a bit.
This is a slow cure epoxy with a pot life of about 45 minutes or so. If
you start a second tube, start with a fresh cup, spoon, and brush, as
the gelling first batch will affect the viscosity and wet out of the
fresh epoxy more than you would think.
Glassing the Airframe
The procedure illustrated here is for glassing the airframe - not for
making airframe tubing. For this illustration I will be using carbon
fiber.
My tube has the endcaps installed, pushed in until snug, but not wedged
too tightly. Mostly we don't want epoxy to creep past the mylar and
puddle inside and/or glue the endcap in.
My tube has the endcaps installed, pushed in until snug, but not wedged
too tightly. Mostly we don't want epoxy to creep past the mylar and
puddle inside and/or glue the endcap in.
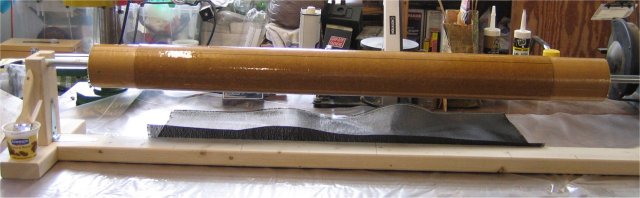
I have wet out my tube with epoxy. A wet coat lengthwise and all the
way around. Then I'll position the reference line towards me. The
carbon fiber fabric is positioned relatively closely and largely lined
up.
It's hard to see in this picture, but the I beam of my jig has a
cenerline and outling marks every six inches. I also have marks for the
standard widths eg 30, 40, and 50". Thus if my tube is centered and my
carbon fiber is centered then it will all just pull up, roll up, and
lay up nicely without pulling the weave sideways.
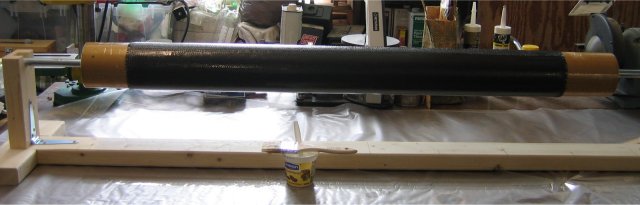
The aiframe tube is wrapped. I skipped a lot, but didn't have help to
take pictures. I used the technique described in the Shadow Composites
videos, which is to hold the brush (a 2" chip brush) perpendicular to
the tube, and use a rolling motion to work the epoxy in and work down
the tube. You want this mushing motion not a dragging, pulling, or
pushing motion, esp when starting the initial edge. If you learn this
motion you'll get a great layout without the squishing and kneading and
mess associated with the hand sequeeze technique. I'll try to
illustrate with a photo sometimes later.
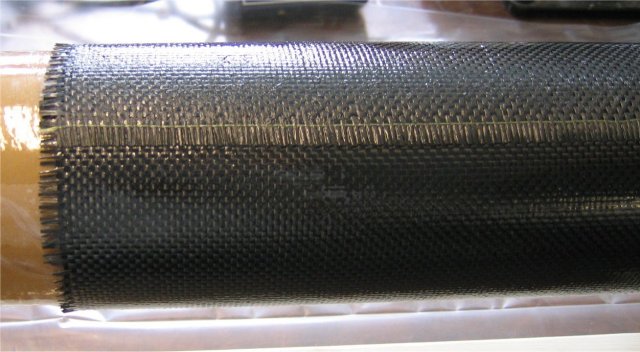
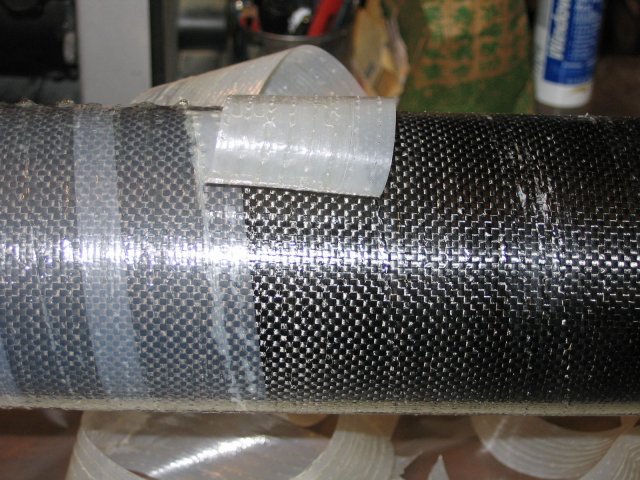
Here's a closeup detail. This edge finished out nicely. It's time to
wrap it with the heat shrink tape.
I used Dunstone's Hi-Shrink II tape. It's working range is 200F - 400F.
This roll is release coated so I'll try to use it without peel ply or a
release layer. This roll is also perforated. Dunstone says the
perforations are more for volatiles then epoxy bleed out, but I'm
trying it for bleedout. We'll see. I was happy to see that the ridges
in this picture are smoothed out after heat is applied. I did a
shrinkage test and at 250F a 4" cut sample had shrunk to 3.5"
I don't know if this is the product that Aerocon sells. It would appear
to be a higher shrink / higher temp product than used in the ROL
INFOCentral heat shrink tape article.
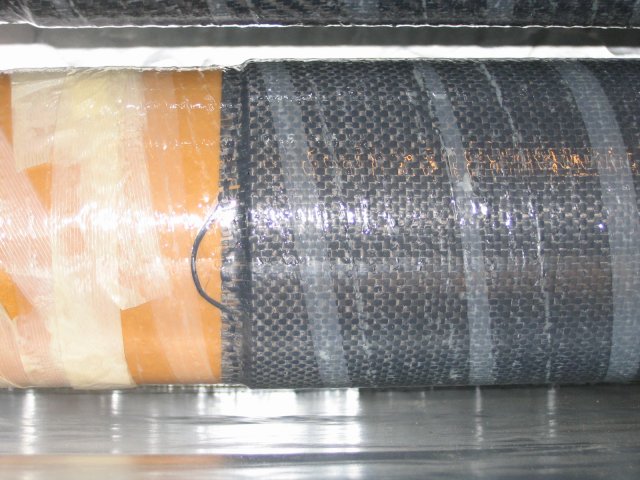
Here's a detail shot of the tube wrapped. This shot is actually after
it's set in the oven, but it illustrates the technique. You'll note
that the ridges in the product roll have smoothed out.
Identify the release side and ensure its towards the epoxy. For
Dunstone it's the outside. Affix the end with some strong tape. I'm
using fiberglass filament tape. Then wrap it snugly and consistently,
and finish the other end with another piece of filament tape. The tape
pulls quite a bit so now I give each end a full wrap of filament tape
to secure it.
I found this heat shrink tape to be a bit of a pain. It's begging for
it's own guide rod, lower, in front, and parallel to the body tube, to
facilitate wrapping without the shrink tape becoming an annoying bit of
product to handle when wrapping. I think the perforated is probably
much worse in the pain in the butt regard, but it is manageable.
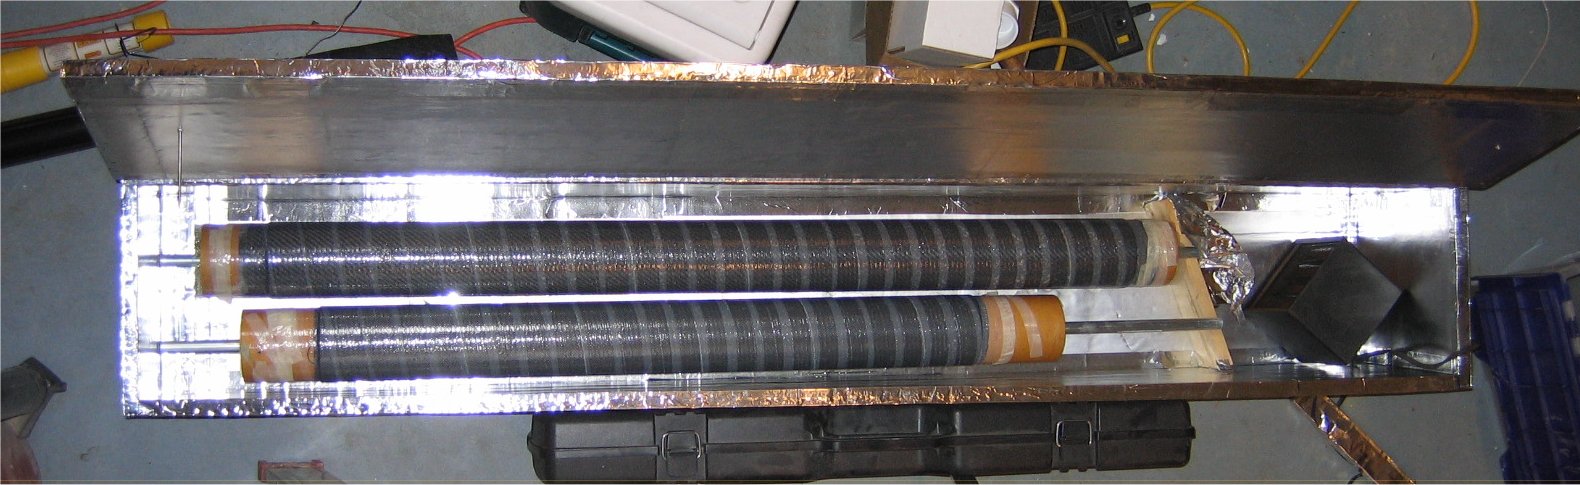
Here are two tubes curing in the oven. You can see that the shrink tape
has shrunk and smoothed out. You might discern puddled epoxy on the
floor and beads on the shrink tape.
The heat source is a 1500 watt ceramic cube heater. It will heat up
this box to 250F in about fifteen minutes and that is adequate to get a
reasonable set to the shrink tape (300F would be even better). The
heater is too hot, however, for a more normal post cure temperature of
170F or so (AeroPoxy), and the internal fan, which is an electronic
computer type fan, didn't like the router speed controller, so I will
need to work something out to make it easier to finish curing at a
lower temp (high temp is fine for Mr Fiberglass, but not for AeroPoxy
or West Systems).
I'm unwrapping the tube now. You can see the beads of epoxy at each
perforation hole so you can imagine how much it worked out that is not
weighing down my weave. There's also a nice puddle cured to the bottom
of my post cure oven.
I'm noticing that the heat shrink tape is
sticking some, with small patches tearing and sticking. A defect in the
release layer? I don't know. It's cool in the garage, so perhaps a
warmer tube would release more consistently. I unwrapped it the rest of
the say and find that if I pull the tape along the axis of the tube
that it will stick less. Do this slowly, and if it some part is stuck,
work it slowly with a pocket knife blade and most will pop up.
Next is to pull the endcaps and clean them up, and to trim the ends of
the glassed tube
flush. I'll also weigh the tube to see how well I did on conserving
weight and also to enter that weight in Rocksim for that part of this
rocket.
All in all, a nice result for an afternoon's work, and these my first
time too. I believe one can really get used to cranking out tubes or
glassed tubes in a couple hours each, and at a far cry from the
exhorbitant rates for even amateur commercial products (look at PML's
pricing for equivalent work!).